- Last Updated on
Bosses are the primary indicator of player progression, as fighting them shows how well you understand the game mechanics, in addition to the state of your equipment and supplies. As such, defeating these powerful beasts of myth and legend are priority number one. The only problem is, as one would expect, they don’t go down easy.
This guide of Valheim bosses aims to make your Viking’s quest a little more straightforward. In it, we will discuss how to summon each boss, recommended equipment and items to bring, possible rewards, and the best tactics for each battle. Hopefully, your Viking’s un-life will be made that bit easier.
💥 Don't Miss These Latest Deals 💥

- 27 inch QHD (2560*1440) display with the DCI-P3 90% wide color gamut brings what you’re watching to life in over 16.7M colors

- Nvidia ampere streaming multiprocessors
- 2nd generation rt cores:
- 3rd generation tensor cores

- NVIDIA GeForce RTX 3070 Ti GPU
- 12th Gen Intel Core i7 14-Core CPU
- Next-Gen Vapor Chamber Cooling
Eikthyr, the mystical stag
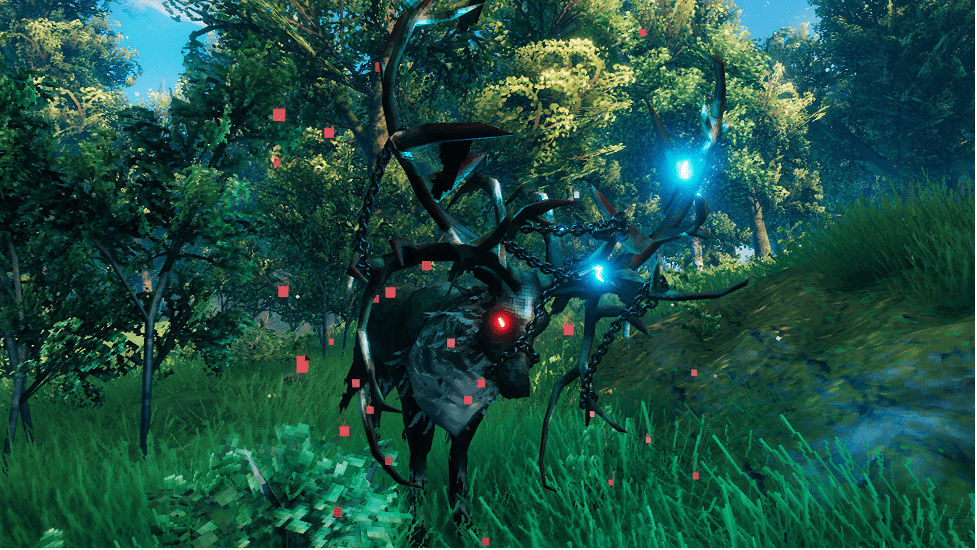
Eikthyr, the first of the Valheim bosses, is your first quarry, one that can be found after examining the Vegvisir runestone next to your spawn. This doom deer can be summoned at his forsaken altar, the same as the other bosses, with one usually being quite close to spawn, and several others dotted about the meadows of your starter island. Once you have found Eikthyr’s altar, 2 deer trophies must be sacrificed to summon him.
Equipment
Eikthyr is certainly the easiest boss in Valheim, but he can still pose a threat to unprepared beginners. For an easy win, you should suit up in leather armor with a deer hide cape, bring a bow and arrows, plus a shield and your favorite melee weapon. Eikthyr doesn’t have any particular elemental strengths or weaknesses, so any weapon or ammo choice will get the job done. Eat some food and you’ll be good to go.
Ultimately, Eikthyr is only a test of your grasp on the basic mechanics of Valheim, so it isn’t necessary to arm yourself to the teeth, unlike some other Valheim bosses. He can be quite easily beaten with only a club, so if you think you can catch onto his move set quickly, dive in with a basic weapon and a little food to allow for mistakes.
Also Read: Valheim Progression Guide
Battling Eikthyr
The stats of this boss are pretty low, so don’t worry about a long fight, even if you’re lightly equipped. He has 500 HP, with his 3 attacks hitting within the 15-20 damage range. As you can see, Eikthyr isn’t much, so much so that dying to him is arguably more impressive than defeating him.
At any rate, Eikthyr has 3 attacks that he will select depending on your position. Up close, he will swipe with his antlers, dealing 20 piercing damage. Alternatively, he may use an AOE attack that deals 15 lightning damage, though does have a large radius which could be an issue if you need to retreat. Lastly, he will fire a bolt of lightning that deals 15 lightning damage, something reserved for opponents at range.
Avoiding these attacks is quite simple, as they are clearly telegraphed and quite focused. Any shield can be used to deflect these attacks, you shouldn’t have to worry about taking damage.
As long as you rotate around him, striking during the intervals between his attacks, beating Eikthyr will be a foregone conclusion. A bow will help speed this up, as you can deal damage during his attacks, or in the event he knocks you back.
Spoils
Upon your glorious victory over the deer, Eikthyr will drop a trophy and 3 hard antlers. The antlers can be used to craft your first pick, allowing you to mine the metals in the Black Forest. Placing Eikthyr’s trophy at his Sacrificial Stone will unlock his forsaken power, which reduces the stamina consumption of running and jumping for 5 minutes.
Boss events
As a side note, each boss has one or more events attached to it. These events usually amount to raids on your bases, with the assailants being connected to the next boss you have to face. Naturally, these raids ramp up in difficulty as you progress.
If you want a more relaxed journey through Viking purgatory, you can skip Eikthyr entirely, then continue with the rest of the Valheim bosses. As you’ll miss out on the first pickaxe, you’ll need to find another way to collect the tin and copper needed to make a bronze pickaxe. One way, if you don’t mind getting exploity, is to find a troll, then bait it into attacking you near ores. As they deal huge amounts of damage, they’ll smash through the veins in no time.
Once done, you’ll be in the same position as you would be after defeating Eikthyr, without having to worry about the escalating raids, as the game will still think you haven’t started the boss chain.
The Elder, First of the Forest
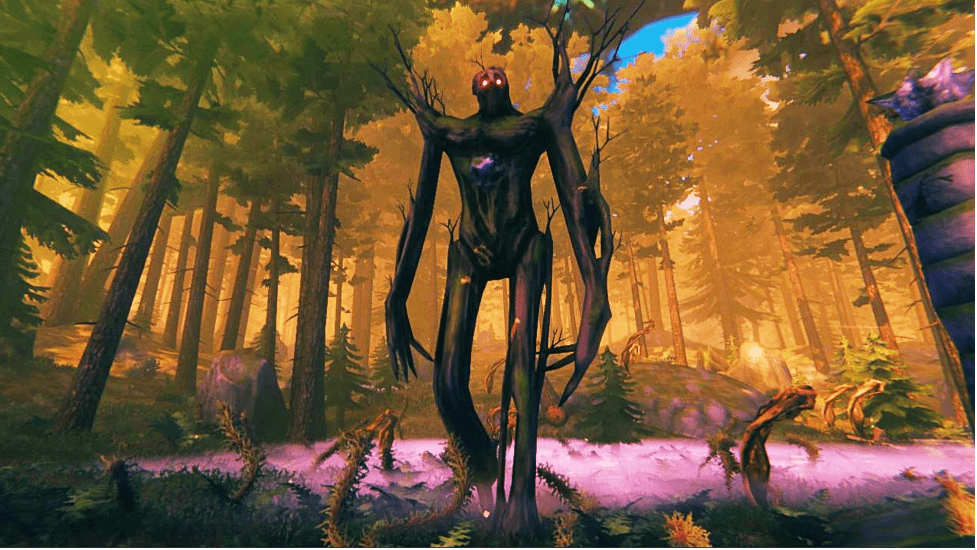
If Eikthyr gave you the impression that Valheim’s bosses were complete pushovers, the Elder will be a rude awakening. His forsaken altar can be found in the Black Forest, requiring 3 ancient seeds to be sacrificed to summon him. Vegvisirs for his altar can also be found in the Black Forest, with some also spawning in burial chambers.
Equipment
From here on out, arming yourself well is a pretty good idea. Treating it like Eikthyr is a good way to get yourself killed. Even decently equipped Vikings will have a small margin for error. Bronze armor will offer you the most protection, though confers a 10% movement speed penalty.
If you’re playing solo, it might be best to go with troll hide armor instead, it will help with evading the Elder’s attacks. As for weapons, a fine wood bow with a lot of fire arrows is crucial to exploit his weakness to fire, while a bronze sword or axe plus a shield will be good in close quarters.
You should eat the best food available to you, as the Elder’s attacks pack quite the punch. Queen’s jam, cooked boar meat, and grilled neck tails will give you a large amount of HP and decent stamina. You’ll need it.
Battling the Elder
The Elder is a real step up. Compared to Eikthyr, he has 2500 HP, with another set of 3 attacks that deal from 35 to 60 damage. Unprepared or inattentive, you’ll be dead in a couple of hits.
The Elder is a threat both at range and up close. His melee attack is an AOE stomp that deals 60 blunt damage across a pretty large area. It hurts, but can be completely blocked by the bronze buckler.
His second attack can be used both near and far. He will raise an arm, with roots growing nearby a few seconds after. Getting close to them will earn you a swipe, but they are little more than a nuisance. You can either destroy them, or relocate. They will disappear after a while.
The third attack is the heavy lifter. If you’re out of his stomp range, you’re likely to receive his vine shot, an attack of several barbed vines that deal 35 piercing damage each, something that can kill you easily if you get careless.
Unlike Eikthyr, the Elder means business. He hits hard and fast, with a good amount of HP to draw out the fight. The best tactic against him is to bring a few friends – one to act as the tank, the others to dish out the damage. If you want to fight him solo, however, you’ll want to alternate between ranges.
You should use the stone pillars of his altar as cover from the vines, as they are indestructible, firing arrows between his attacks. Eventually, he will summon roots, which are often best left alone. Taking the time to destroy them can give the Elder a window to hit you, and he doesn’t need many to put you down. Alternatively, you could get swarmed by Greydwarves, as the Black Forest is their home. In either event, closing in to bait a stomp is a good idea, as he can deal damage to the other enemies, in addition to his legs offering cover.
Afterward, you can either return to range, or continue hacking away at him. Rinse and repeat this process until the halfway mark. Once there, a Greydwarf Shaman will spawn, one which will heal the Elder’s health. It usually gets quite close to him, so kill it quickly and return to the main course. Return to your strategy and finish the fight.
Spoils
The fruits of your efforts are the Elder’s head as a trophy, which can be sacrificed for his forsaken power, and a Swamp Key. The forsaken power gives you an extra 60% chopping damage against trees, allowing for quicker harvests, while the Swamp Key is what you’ll need to access the next resources needed for better equipment – iron.
Bonemass

This next boss will take you to the swamp, a fitting home for this sentient sludge ball. His altar’s Vegvisir can be found in the Sunken Crypts dotted about the swamplands, along with the iron you will need to upgrade your equipment. They’re difficult to miss, marked by greenish torches, and are unlocked with your newly acquired Swamp Key.
Alternatively, you might find a Vegvisir in the stone towers, though Sunken Crypts tend to be both easier to find and more worthwhile, even if it takes a few to find it. Once at the altar, you will need to sacrifice 10 withered bones to begin the fight.
Equipment
Bonemass is pretty tough, hits hard, and has a few notable resistances. You’ll need to prepare well, and might need to switch up your weapons for an easier time of it. He has resistances to slash, fire, pierce, and poison, with the former being a light resistance and the latter being complete invulnerability.
The good news is blunt damage is a weakness, as is frost oddly enough. You should bring a mace or an Iron Sledge to exploit the blunt weakness, but leave your bow behind due to the piercing resistance. If you’re having trouble with Bonemass, you can craft frost arrows. You’ll have to go out of your way for them, traveling to the mountains for obsidian and frost drakes, but it’s the price you pay for an easier fight.
On top of that, you should bring upgraded iron armor, an upgraded shield, your best food, and most importantly, poison resistance meads. Bonemass uses a lot of poison, so much so you can’t avoid it, making this mead a literal lifesaver. Consider brewing a few healing meads also.
Battling Bonemass
As mentioned, poison is a central part of this fight, though Bonemass can pack a mean punch in blunt damage too. His standard melee attack will deal 80 blunt damage and 30 poison, while his AOE will deal 100 poison damage in a wide radius. It can’t be blocked, but is clearly telegraphed by Bonemass leaning backward. His final attack is to summon monsters, usually oozes or skeletons, by hurling sludge near, but not at, you.
As you can see, that poison mead is priceless. The fight can be done without it, but losing a 75% reduction in poison damage is going to make it rough.
The best approach is to stay mobile, focusing on melee damage when you can. His punch can be blocked, though may stagger you depending on your block skill and shield, or fairly easily avoided. Keep an eye out for his monster summoning, it’s easy to spot and should be a priority, otherwise you risk getting overwhelmed by pests.
Anticipate where the blob will land, then use your Iron Sledge to deal with them quickly. Lastly, his poison cloud will be a huge pain to deal with, so relocate the fight away from the clouds once they come, they disappear after a short space of time anyway.
A good approach for groups is to have dedicated mob killers, while the others focus on Bonemass himself. Alternatively, volleys of arrows from several players will kill him quickly, despite his piercing resistance.
Fighting in the swamp is never ideal, particularly so in the case of Bonemass. Not only do you risk falling into the water, but he has a unique environmental effect that causes non-stop rain. There are a couple of ways to counteract these problems. Firstly, you can build around Bonemass’s altar, creating a fighting pit to avoid the water and intruders, or simply raise the ground nearby with a hoe.
This will give you more fighting space, which you will be thankful for. As for the rain and its subsequent wet effect, taking Eikthyr’s forsaken power should be enough to offset it, though you can take stamina mead for a quick stamina regen. All said and done, keeping mobile and attentive should bring you the win.
Spoils
Killing Bonemass will earn you his head, which can be placed at the Sacrificial Stones for his power, and a Wishbone. His power will give you hefty physical damage resistances of 50-75%, depending on your armor level compared to incoming damage.
The better your armor, the higher your resistance. The Wishbone allows you to find your next material – silver. Found in the mountains, the Wishbone is a near requirement, as it indicates where silver is. You can find silver without one, but be prepared for a lengthy mining expedition. With that, it’s on to your penultimate mark.
Moder
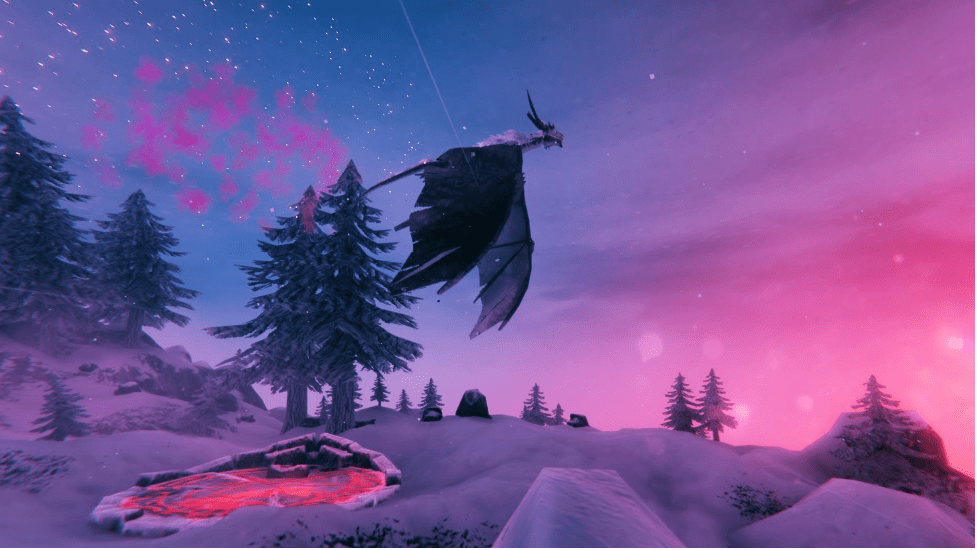
From one extreme to another, you’ll be heading to the mountains for Moder. Vegvisirs for her altar can be found in stone structures, similar to Bonemass’, though they only spawn on high-altitude mountains. You’ll know one when you see one, they look huge. Also only found on tall mountains are dragon eggs, 3 of which are needed as sacrifices for Moder. Once you have them, place one in each of the stone baskets at her altar for the battle to begin.
There is a catch to the eggs though. They are the heaviest item in the game, weighing 200 kg each. It’s impossible to carry all 3 at one time to Moder’s altar, so you’ll need to build storage nearby, then ferry the eggs over. The belt Megingjord will make this easier, as it enables you to carry an extra 150 kg worth of stuff.
This way, you’ll be able to carry an egg plus your equipment and supplies. Dragon eggs respawn at their nests after a time, a few hours roughly, so you won’t have to worry about transporting eggs from far-flung places.
Equipment
There are two critical pieces of equipment for this fight. First is wolf armor, given its resistance to frost. Moder inflicts frost damage, which will be offset by the armor effect, and must be fought on a freezing mountain. While you could drink a frost resistance mead, you run the risk of it running out before the battle ends. Wearing a wolf cape will not run out, in addition to providing you with some extra defense.
The other critical component to this fight is a bow. Moder will alternate between the ground and air, with the latter being impossible to reach with a melee weapon. Bringing needle arrows will deal the most damage, though will require you to journey to the plains and face the dreaded Deathsquitos, so obsidian arrows may be preferable.
Poison arrows can also be used for a bit of extra damage over time. Despite melee not always being useful, you should still bring a good weapon and a shield, as her attacks can be blocked. Silver is best, but not strictly necessary if you can dodge well.
As with all bosses, eating your best food is a good idea. You should also consider bringing healing meads, as they will help in a pinch. With that, your preparations will be complete.
Battling Moder
Moder has some fairly strong attacks, plus some high stats, though all in all isn’t as much of a challenge compared to Bonemass or the Elder. She has an HP pool of 7500, plus attacks that vary depending on whether she is grounded or airborne.
Grounded, Moder will approach you, aiming to attack with her frost breath or melee. Her swipes and bites will cause 110 damage, while her conical breath attack will deal 200 frost damage. Airborne, she will barrage you with ice crystals, each of which dealing 30 pierce and 200 frost damage.
Despite her stats, Moder isn’t terribly difficult provided you have high stamina. You’ll be doing a lot of running, plus be dependent on your bow for damage when she is airborne. Though Moder is more of a ranged boss, her attacks are easy enough to avoid that you won’t need cover, and her melee attacks can be almost completely negated with a silver shield. Bonemass’ power will also give you a massive damage reduction, so consider using that if you intend to get close. As long as you keep moving, minimizing damage won’t be an issue.
Damage may be more of a problem, depending on how high your bow skill is and how much time she spends in the air. While on the ground she is open to melee attacks, with silver weapons doing significant damage, you’ll need your bow when she’s airborne. As obsidian arrows deal 52 damage, you should bring around 150-200 if you want to use a bow only. To maximize DPS, you should focus on using silver melee weapons when Moder is grounded, switching to the bow when airborne.
Alternating between your best arrows, then your poison ones, will give you an extra bit of damage over time. Additionally, though it doesn’t state it in game, the bow skill will also increase your draw speed, which in turn bumps up your DPS.
The approach to kill Moder is easy, as her attacks are not difficult to avoid. Simply keep to her sides when she’s grounded, and keep in the open for her barrage attack. The crystals disappear after 20-30 seconds, so you won’t need loads of space. If you don’t mind a bit of cheese, you can raise the ground nearby to create an obstacle course. Due to her size, Moder won’t be able to path to you well, often staying still until she decides to take off. This will let you get a lot of damage in undisturbed. Avoid the fight at night though, as wolves and Fenrings will spawn to make your fight an awful lot worse.
Spoils
After your target practice, you will earn yourself Moder’s head, and 10 dragon tears. Her power will give you a permanent tailwind when sailing for its duration. Note that you must be at the helm for it to take effect. The dragon tears will enable you to build an artisan table, which can be used to build a further 3 stations, one of which allows you to harness black metal, the current top-tier material. For your final foe, you’ll certainly need it.
Yagluth, the goblin king
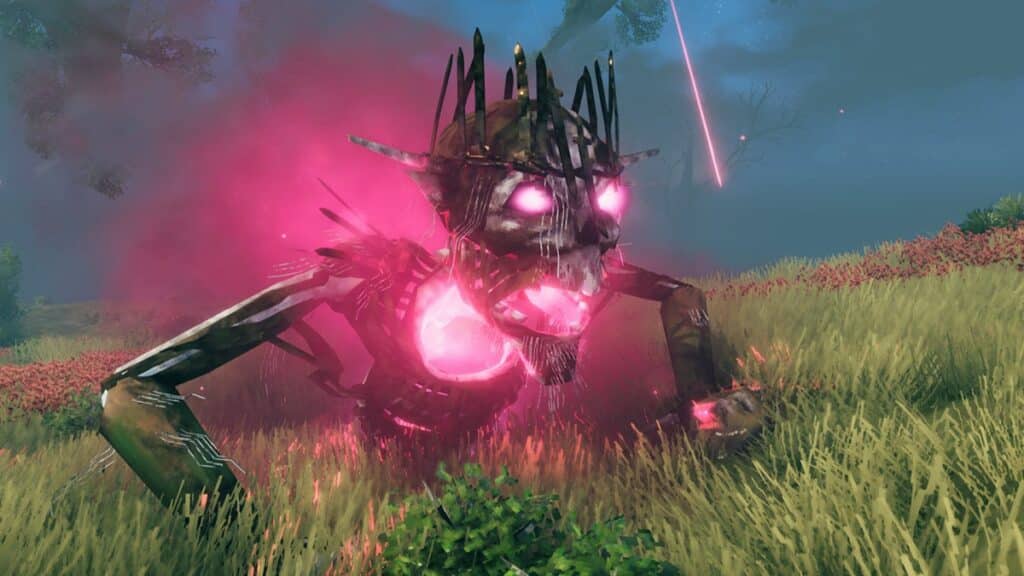
The current final boss, and with it the end of your journey, will take you to the plains of Valheim. There are standing stones in this biome, both lonely ones and groups, near which Vegvisirs for his altar can be found. You must sacrifice 5 Fuling totems to summon him, though be ready for one serious fight when you do.
Equipment
With Moder, you could get away with sub-optimal armor. This is not the case with Yagluth. Don’t let his sluggish movement deceive you, this skeleton hits like a truck. Even suited up in max-level padded armor, you can expect to die in a couple of consecutive hits, especially if you get burned. Even so, top-tier armor is crucial, as it might give you that slight buffer you need to stay alive.
For the best balance between health and stamina, you should eat blood pudding, serpent stew, and lox meat pie. Not only do they give you a great deal of both, but they also provide their buffs for a long time. Also bring fire resistance meads, as Yagluth deals a lot of fire damage, and healing meads.
As for weapons, your bow will once again be doing the heavy lifting, despite Yagluth’s resistance to piercing damage. Melee is a viable approach using Bonemass’ power, but it is considerably more risky than shooting, given his massive damage output. Get a Draugr Fang as close to max as you can, plus around 200 frost arrows. Needle arrows will work too, but frost arrows have a higher DPS, plus can come in handy should visitors show up, as they provide a slowing effect. Consider bringing a shield and Porcupine in case you get caught in the open.
Battling Yagluth
Getting hit by Yagluth is nasty business, and dealing damage to him is no easy task either. He has an HP pool of 10,000, plus 3 attacks that all deal substantial physical and fire damage. Upon raising his right fist, he will launch an AOE attack that deals 65 fire and lightning damage, plus spawn a blue flame that deals 100 fire damage periodically to anyone touching it. Raising his left fist signals a meteor bombardment, dealing 40 blunt damage and 120 fire damage each. His final attack is to breathe fire, which deals 40 fire and 20 lightning damage repeatedly. Though this is comparatively low, the damage tick is very fast, and can easily kill you if caught off-guard.
Your final battle is simple, but you don’t have much room for error. Once you summon Yagluth, move to one of the pillars surrounding his altar. You will use it for cover like you did with the Elder, though be aware that these pillars are destructible. The idea is to finish the fight as soon as possible, else be left with no cover from his attacks.
As they can deal a lot of damage repeatedly, getting nicked by even a single hit can be enough to stagger you, leaving you vulnerable to a follow-up hit which can, and likely will, kill you. Shoot your arrows between his attack intervals, taking cover from his breath and meteors. Once your pillar is looking ragged, wait for a breath attack, then sprint to the next closest pillar during the interval. Repeat this process until you finish the job.
Before the fight, you should clear the general area of mobs to avoid any interruptions. Yagluth is bad enough, the last thing you want is to be ambushed by a Deathsquito or Fuling party. Building your own cover will likely take more time than it’s worth, as you’ll need sturdy defenses to weather Yagluth’s attacks. If you want to prepare, work on leveling your bow skill for the increased DPS. The available pillars are more than enough if you are well prepared and well leveled.
Spoils
Well done on your final victory. Sadly, your rewards are only ceremonial for the moment. You will receive Yagluth’s head as a trophy, which can be used to confer a 50-75% resistance to elemental damage, which works mechanically the same as Bonemass’ power. Additionally, he will drop 3 Yagluth things, though these items currently have no use nor value. With that, your quest is complete, at least for now. Should Ironside implement new bosses, we will be sure to update this guide with all the latest information.
With that, enjoy a peaceful Viking afterlife!
Who’s your favorite of all the the Valheim bosses? Let us know in the comments