- Last Updated on
Valheim is a fantastic open-ended game. For fans of the sandbox genre, Valheim will make you feel right at home. The game gives you near-complete freedom to do as you please, be that exploring the distinct biomes, building intricate Viking settlements, or slaughtering the local inhabitants, just like a true Viking should.
While this freedom is great for us to choose exactly how we want our adventures to play out, this same freedom can make it difficult to measure progression and settle on what to do next. Bosses do provide a clear milestone, visibly moving you from one age to another while testing your grasp of the game, yet they only provide a loose aim for your playthrough overall.
In this Valheim progression guide, I’d like to walk you through the game from start to finish. I’ll be covering both your clear objectives, how to build up to them, and what you might do in the meantime. While I’d like to make this guide as comprehensive as possible, I’ll also endeavor to avoid spoilers and unnecessary details, allowing you to explore the game with helpful foreknowledge, rather than imposing upon you a stale experience.
💥 Don't Miss These Latest Deals 💥

- 27 inch QHD (2560*1440) display with the DCI-P3 90% wide color gamut brings what you’re watching to life in over 16.7M colors
- Nvidia ampere streaming multiprocessors
- 2nd generation rt cores:
- 3rd generation tensor cores

- NVIDIA GeForce RTX 3070 Ti GPU
- 12th Gen Intel Core i7 14-Core CPU
- Next-Gen Vapor Chamber Cooling
Crossing the veil
So, here you are, alone and in rags in a Viking purgatory. I’m sure you’ll have several questions from the get-go, though I’ll be focusing on the most important one – what to do first?
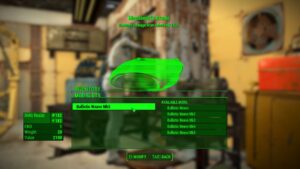
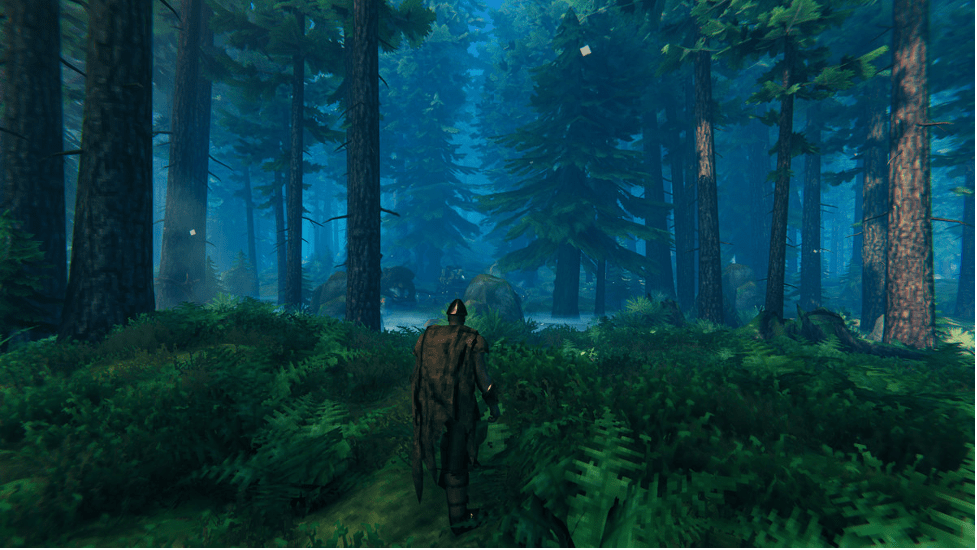
If you’ve ever touched survival games, you’ll already know the general idea. Gather some basic materials, mainly stone and wood, fashion some crude tools, then set to work building your first base. The same idea is true for Valheim, though you’ll likely want to do a bit of exploration before you settle down. Craft yourself a club for defense, an axe for quicker wood collection, and a hammer, then it’s time to explore. Before you leave your spawn, make sure you interact with that glowing runestone. This is a Vegvisir, a sigil that will show the location of its associated boss.
Unlike many other survival games, the first night in Valheim isn’t terribly dangerous, at least so long as you keep to the meadows. To begin with, night doesn’t bring new or more dangerous enemies, so you don’t have to rush to set up camp. Instead, take your time, wander about and get your bearings, then begin putting down roots once you’ve found somewhere you like the look of.
Your first base
There are a couple of things to look for in your first base. Firstly, quick access to water is crucial. Boats in Valheim are a requirement for exploration and transport later on, so settling near a river’s mouth or along the coast will spare you from future hassle. Next, you’ll want easy access to lots of wood. Making anything in Valheim will cost you a fair amount of wood, so having a dense forest nearby will be a lifesaver.
Lastly, though this is somewhat down to personal opinion, you’ll want a lot of space, or at least the ability to get it quickly. There’s an awful lot in this game, from workstations to general items, so you’ll need places to put it all. As you need shelter to use workstations anyway, I like to build something for each individual station, to make my base more of a village. Of course, you might prefer packing everything into one building, so do whatever suits you.
Gathering necessities
Once you’ve crafted your basic equipment and thrown together some shelter, your next priority should be your empty stomach. Food in Valheim is a little different from other survival games. While you can’t starve to death, food is still critical for survival. Each different item will either provide you mostly health, mostly stamina, or an even amount of both.
These stat buffs will last for some time, again depending on the exact item, and are priceless when fighting the plethora of tough enemies and bosses that populate the other side. For now, you won’t have access to Valheim’s delicacies, but you can get some nice meats and berries. Hunt some deer, boar, and necks in the meadows, and you’ll almost certainly stumble across some raspberry bushes along the way. If you’re having trouble finding specific animals, I find a lot of necks near water, boars near hills, and deer in thick woods, hopefully you will too.
Also Read: Ymir Flesh – What Is It & Where To Find It
Before moving to the next stage of Valheim, you’ll need to do a fair bit of hunting. For that, I’d recommend making a crude bow as soon as you can. This will make it easier to hunt deer and in general, plus level up your bow skill, which will be helpful later. Once you have some food, hunt deer and boar until you have your crafting bench upgrades and some leather armor. You don’t have to be excessive, but some basic defense will be helpful. Now, it’s time to gear up for the first boss fight.
The first Forsaken
Now you have a base of operations, some decent food, and entry-level equipment. You’ve outgrown your starting area, so it’s time to look further afield. First, however, you must demonstrate your Viking prowess by battling your first boss. You won’t need too much for this one, he’s a bit of a pushover, but you should still grab your armor and 3 different foods. The buffs will come in handy in case of mistakes. In this guide, I won’t go into much detail regarding bosses. If you’d like more information on each one, plus a detailed guide on how to defeat each one, click here.
Once you have won your first victory, you’ll get a couple of handy goodies. A trophy, which you can sacrifice for a daily-use power, and a unique drop. In this case, you’ll earn a material that can be used to craft a pickaxe, which can be used to harvest metal ores found in the next biome you’ll visit.
The adventure begins
With the first boss defeated, you will have a basic idea of the mechanics and gameplay loop of Valheim. Essentially, you will move to a biome, establish a base, harvest materials, then defeat what amounts to an area boss. This brings us to the next step – venturing out of the comfort of the meadows and into the Black Forest.
You’ll likely have noticed that there are very few enemies in the meadows, none of which are especially threatening. The Black Forest is a bit of a step up. The enemies won’t cause you too many problems, though things can get hairy if they catch you off-guard. Either way, this forest has a few things you need, so suit up, grab your pick, and keep your wits about you.
First order of business
The first order of business is to explore. Specifically, you need to look for caves that have small entrances. I specify small because there are caves with big entrances, though I’d hesitate to go in them just yet if I were you. Assuming you won’t cave to curiosity, keep on looking for those small entrances. In them are a few enemies, skeletons usually, guarding a much-needed treasure – surtling cores. These cores are the most important item in the forest for now, as they are used to build charcoal kilns, smelters, and portals. The first two allow you to make use of the remaining treasures of the forest, namely tin and copper ore.
Neither ore is terribly difficult to find, though you’ll have to look in certain areas. Tin usually can be found along rivers and the shoreline, looking like a glistening stone. Copper is typically deeper in the forest, found in large deposits that take a fair bit of mining to get a good haul. Once you have at least 10 cores, some tin, and as much copper as you can carry, it’s time to head back to base.
Entering the bronze age
Once back home with your stations made, it’s time to start making bronze. To do so, smelt the ores you collected, build a forge, then use it to meld your metals together. Bronze ingots are two parts copper, one part tin, so you should try to prioritize copper when taking trips out to the Black Forest. Once you have your first bronze ingot, congratulations!
You have now entered the bronze age, your reward being a variety of new recipes available at the forge. New weapons and armor can now be made, in addition to a few handy tools like the cultivator, which allows you to set up a farm. You can also make a cauldron with tin, which you need for advanced foods and mead bases, along with a fermenter to brew said mead. Mead is essentially a potion, which can heal you or apply a certain buff.
With the means to create bronze at your fingertips, you’ll need to set off to acquire a good chunk of the stuff. Bronze is needed for a lot of equipment, upgrades, and most importantly, your first boat. That said, it can be quite a pain ferrying your ores from forest to base so often, so on to the next part of this Valheim progression guide.
Also Read: Valheim Fishing Guide
Establishing your first outpost
Transporting ores is one of the most frustrating parts of the game. By now, you’re probably sick of the journey to and fro your mining spots. You might have even noticed a particular attribute to ores and metals, namely the fact they can’t be teleported. While irritating, this is done to promote exploration and the creation of minor bases across the world of Valheim. So, it’s time for your first outpost.
Where you choose to build your outpost is largely up to you. You could prioritize proximity to ores, or opt for a spot near the sea or on the forest’s outskirts for ease of material transport. I prefer areas near the sea, as I do most of my transportation by boat, and generally find such areas more defensible. Once you have your outpost built, it’s time to gather that ore. Your business in the Black Forest is not over yet.
The second Forsaken
You’ve forged your bronze equipment, built your new structures, maybe even explored the new foods available to you. Well done. Now it’s time for your second boss fight. Again, I won’t go into detail, but I will warn against going in with undue confidence. Your fight against the first boss may have convinced you that Valheim’s bosses are no big deal, though such a misunderstanding will sting you, hard. Prepare well for this fight and craft a few fire arrows while you’re at it, they’re indispensable for the fight ahead.
Victory over this boss will earn you a new trophy, which can be sacrificed for a second power. Your other reward will be a Swamp Key, an important item that paves your way to the iron age. Head back to base and lick your wounds, it’s time to prepare for your first voyage.
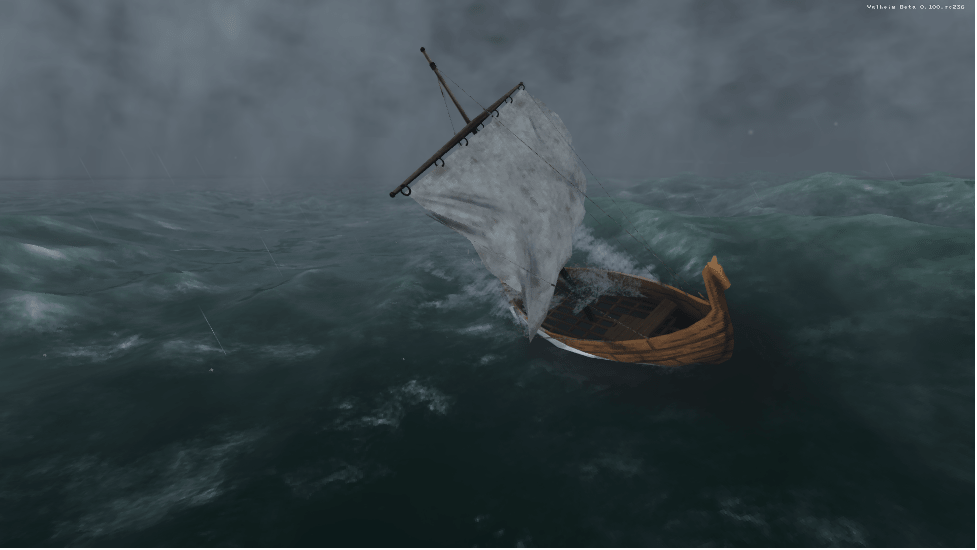
Building the Karve
Acquiring bronze really opens up the game. Not only does it make available stronger equipment, but it also allows you to build your first boat, the Karve. You almost certainly need it for your next destination, though you might also need it to even reach the second boss. It can spawn outside of the starting island, but generally sticks quite close to it.
To build the karve, you need 80 bronze nails, in addition to a few other items that you’ll likely have stored away. Once you flex your ancestral shipbuilding muscles, it’s time to take to the open ocean in search of your next conquest.
Related: Valheim Abomination Guide
The voyage away from home
Up until now, you have likely been confined to your starting island. With your defeat of the second boss, or possibly even beforehand, the time has come to look beyond the boundaries of home. The swamp will be your next stop, where you will be looking for sunken crypts, which can be opened by your Swamp Key. In them lie iron scrap, which can be smelted into iron ingots. This will be your first objective here. The altar for the next boss is also found in this biome, for when you are better equipped. Before setting off, it can be a good idea to set up a portal at your main base, then take the necessary materials for a second with you.
Once you’ve found a large swamp, it’s time to search for a good place for your second outpost, then link it with your main base via a portal. Now that you’re established, it’s time to venture into the fetid wasteland.
The swamp is a considerable jump in difficulty. The enemies here are tough, can inflict poison, and it’s always wet, decreasing your stamina recovery. Expect to die here, at least once or twice. With your current gear, many enemies will be able to kill you within a few hits, while your damage output will be lacking. If you don’t watch your step, you risk a slow death by poison, an ailment several enemies can inflict. Fighting multiple enemies can also be an issue; as the permanent dampness affects your stamina recovery, weathering blow after blow can keep your stamina at zero, making yet another death close at hand. All in all, be attentive while in the swamp, at least until you have your first iron equipment.
In search of the sunken crypts
Unlike the Black Forest, there is only one main attraction to the swamp – sunken crypts. They don’t just contain iron ore, in fact, pretty much everything you could want from the swamp is down there. Of course, while the iron is the most important item, treasure can be found littering the crypts, alongside mob drops and, notably, withered bones. Treasure can be sold to the trader, which you may well have come across during your exploration of the Black Forest. Mob drops can be used for food and weapons, while withered bones are required for the third boss.
Related: Valheim Bosses Guide
That all sounds good, but how do you find these treasure troves? Well, you might be in for quite a sail, as they don’t spawn reliably. I suggest looking for big patches of swampland, as crypts seem more likely to spawn there. You may even find a new source of surtling cores too. Once you have enough swamp to get lost in, it’s time to do just that. With enough time in a large enough area, you can’t help but stumble across crypts.
They’re quite visible from far away, as they are one of two stone structures in the swamp, and the only ones illuminated by greenish torchlight. When you find one, be sure to mark it on your map. Iron is heavy, so you’ll probably need a couple of trips to fully harvest the goodies within. Like with copper and tin, mining enough iron to get the necessary equipment will take a while, so settle in for the long haul.
Entering the iron age
You’ve found your first crypt, mined a chunk of iron, and are now back at base. Great, but what exactly should you do with it? There are an awful lot of options, both in terms of equipment and new things to build. Forging the new armor is a no-brainer, but the same can’t be so readily said for weapons. Personally, I recommend sampling each weapon type, provided you don’t mind more iron mining. Each weapon has its pros and cons, in addition to distinct appearances.
All weapons can be used effectively too, so you won’t be completely wasting your time forging them all. That being said, there is an optimal weapon type, for those of you that like to min-max. Almost every enemy has resistances and weaknesses, with the most common weakness being blunt damage. Because of this, clubs will be the best for reliable damage across all enemies. No enemy has a weakness to slash damage yet, so swords are the least reliable for damage.
It is possible that this will change in the future, however, so don’t get too comfortable with your big sticks.
While the equipment iron offers is great, there is another, arguably more important, upgrade for you. For 100 iron nails, some ancient bark, and some other common materials, you can make yourself the pinnacle of Viking shipbuilding – the longship. In addition to being significantly faster and more durable than the Karve, it has a storage hold of 18 slots. It doesn’t seem as though cargo weight affects the ship itself, so store whatever you like in there. With this, Valheim really opens up to you, as travel becomes a breeze.
Also Read: Valheim Fine Wood – How To Harvest The Hardwoods
The third Forsaken
After doing a fair bit of mining and exploring, you’re probably itching to move on from the swamp, and not only because of the bug bites. As you were spelunking, it’s likely that you came across the Vegvisir for the next boss, the altar for which will be deep in a swamp somewhere in the world. To tackle this guy, it’s worth making a few investments, both in time and resources.
I’ll keep it brief, but this boss will require a bit more preparation than the last two. Poison resistance mead will be crucial, as all of his attacks will inflict this effect. He is highly resistant to arrows, so either craft a couple of hundred iron ones, or forgo the use of a bow altogether. His main weakness is blunt damage, so craft an iron mace or sledge if you think your current weapons won’t cut it. With that, the rest is up to you.
Once you have this nightmare defeated, dust yourself off and collect your spoils. You’ve earned them. You’ll get the usual trophy plus power, alongside a Wishbone. This will allow you to easily find silver deposits hidden atop the mountains of Valheim, as well as treasures sometimes dotted about the meadows. With your rewards pocketed, it’s time to move on to the next stage of your adventure.
Ascending the snowy heights
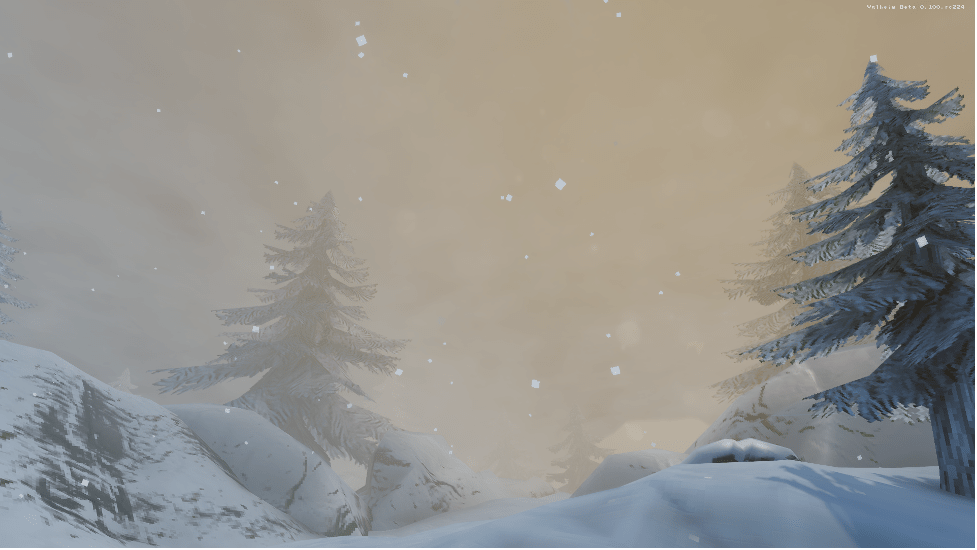
Until now, your adventure has kept you on pretty flat land. Sure, some of it has been wet and gross, maybe there have been a few hills, but nothing to prepare you for the hike ahead. You’ve probably seen them while sailing, off in the horizon, heaven-piercing mounds of rock and ice. That’s right, your next destination is the frigid peaks of Valheim.
Before you even think about exploring the mountains, you need to brew up some mead. Traveling through the mountain biome will apply the freezing effect to you, which will repeatedly inflict frost damage until you die. Drinking frost resistance mead will immunize you to this effect, allowing you to begin your climb. Don’t forget to bring that Wishbone with you, it’s important for the task ahead.
There are a few things to look for up in the mountains, their difficulty to find is largely dependent on the size of the mountain. Quite like with the swamps, bigger is better here, as a massive mountain range will give what you need more places to spawn. Once you have found a big one, it’s time to explore.
Equip the wishbone
First off, equip that Wishbone you plucked from the third boss. It acts like a metal detector, pinging faster and at a higher pitch the closer you are to a treasure. While it has uses in the meadows for finding gold and trinkets, you will use it in the mountains to find silver, the material you need to advance your arsenal. But silver isn’t all you’re looking for in the mountains. Wolves make their home here, their pelts necessary to improve your armor and even supply you with a frost-resistant cape, allowing you to explore without the need for mead. As a bonus, cooked wolf meat offers a decent health buff, so consider adding them to your menu.
Depending on how lucky you are, you may need to hunt wolves for a while, as a trophy is needed to craft the warm wolf fur cape. If you’re having trouble finding wolves, try searching at night. It’s a bit more dangerous, but I’ve had more luck finding packs then. The last priority material is mostly for archers. Near the peaks spawn drakes, which drop frost glands upon their death. This can be used to craft frost arrows, the current best arrow in Valheim. Once you have yourself a good helping of new materials, it’s time to head back to base and get tailoring.
Harnessing silver
Other than several new equipment options, silver does not unlock a whole lot for you. What little it does unlock, however, is crucial. To begin with, you will want to craft the wolf fur cape, as that will let you explore the mountains without feeling the cold, in addition to offering resistance against cold damage. This is also true for the silver armor set, which will be instrumental against the upcoming boss. The last big player in the silver equipment set is Frostner, a club-type weapon that applies blunt, frost, and spirit damage, making it a powerful weapon against pretty much any enemy. Some new foods will also be made available to you. Wolf meat is a pretty good addition, but the main dishes require a butcher’s table, the second upgrade to your cauldron. Other than that, there isn’t much more of use, making silver one of the more disappointing ages in Valheim.
Establishing a mountain base
Mountain bases for resources are less of a requirement than bases in the previous biomes. This is down to two reasons: firstly, silver deposits are not as plentiful as other ore deposits, while secondly, it has fewer uses than previous metals. Usually, you can fetch enough silver to last you in a short space of time, especially if you have a boat or cart nearby. After a few climbs, your mountaineering will lose its resource focus, instead switching to hunting the next boss, which I’ll go over next. Mountain bases can still be fun to build though. The biome is unique, lending itself well to creative builds, if you enjoy building of course. Having a base near the boss altar could be a good idea, especially if you intend to station a portal nearby. Unprotected portals risk getting attacked by enemies and the boss itself, which could force you on an unplanned saga. Other than that, mountain bases are not terribly useful.
The fourth Forsaken
Finding and summoning this boss is quite a pain. Be prepared to do some serious traveling; both the altar and Vegvisir are only found atop the highest mountains, even then only rarely. I had an instance where it took almost a dozen mountains to find the Vegvisir, then a cross-world voyage to reach the altar. It is all down to luck of course, but it’s certainly the boss I’ve had the most trouble finding. On to the second nuisance – the 200kg eggs. Due to the weight, you’ll need at least two trips to the altar, since summoning the boss requires 3. As the eggs can’t be teleported, you have a good deal of legwork ahead of you. These eggs can be found quite easily throughout tall mountains, the nests guarded by drakes. If you’ve already done a fair amount of mountaineering, you likely have the 3 eggs needed. If so, well done you, if not, enjoy the trouble to get them.
I recommend using Megingjord, the belt you can buy from the trader. It enables you to carry an extra 150kg, which is very helpful for this particular task. Once you have the altar located and eggs in hand, head over with some frost resistance meads, silver armor, and a few hundred of your best arrows. You’ll need them for this fight.
Your spoils for this boss are the fourth Forsaken trophy and power, alongside a unique item that allows you to craft a few useful stations. They will come in handy as you enter the next area, the current end of the game.
A journey’s end
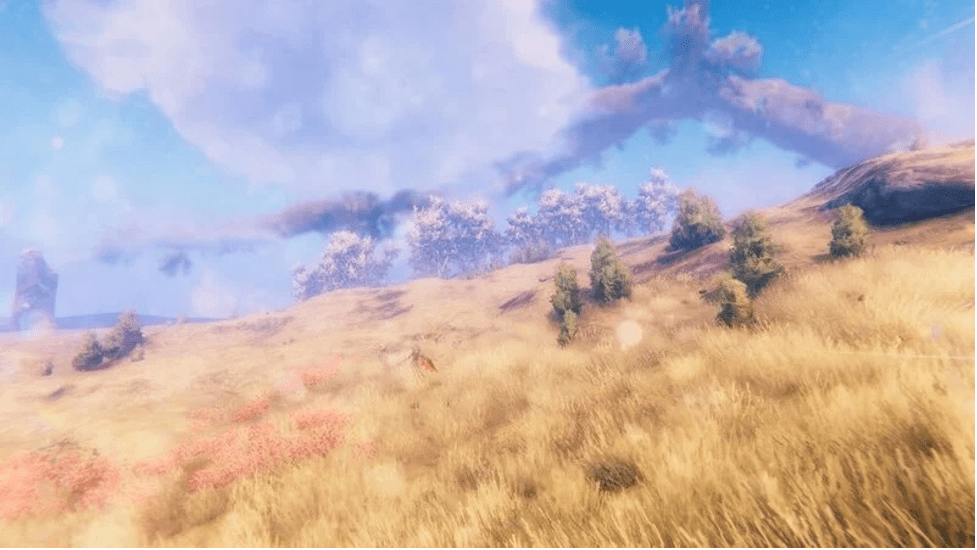
With four bosses defeated, a chunk of the world explored, and an arsenal fit to make any Viking blush, you are ready to face the last area Valheim has to offer and the last part of this Valheim progression guide. Assuming you haven’t stumbled across it already, your last destination is the plains biome. While I’d say the materials here are more substantial than the silver found in the last biome, you ultimately don’t need them to fight the locals nor the boss, though I’m jumping the gun a bit here. If you’d like to skip to the boss, then by all means. For now, I’ll go into a bit more detail about what to expect in the plains.
In case you haven’t been made aware by an ill-fated early expedition, the plains is home to the most dangerous enemies in Valheim. Poorly equipped, you aren’t likely to survive long here, though as aforementioned, silver gear and some combat experience will carry you through no problem. Your main priorities here are to find Fuling camps, full of little goblins and their treasures, alongside totems you will need to summon the final boss. Here, you must unleash your inner Viking, raiding and pillaging to your heart’s content. The Fuling grow flax and barley, crops used to craft top-tier gear and food respectively. When killed, the Fuling will drop black iron, which is the second requisite material to craft the endgame gear, though as I said, it isn’t needed. With the pillaging out of your system and some loot acquired, it’s time to think about settling down.
Little base on the prairie
Unlike a mountain base, building in the plains is a useful thing to do. Flax and barley can only be grown here, granting you permanent renewable access to the best foods in the game. Having an outpost in the area can also help in harvesting materials from the local wildlife, which will allow you to craft the best arrows and other items, in addition to a load of decorative building components. Be sure to use stone in your base for a sturdy defense, wood won’t resist enemy attacks for long.
The final Forsaken
Now that you’ve had your fill of the plains, it’s time to conclude your mission in Valheim. Five Fuling totems are required for the summoning. If you are having trouble finding them, simply look for camps with large bonfires at the center, they seem to always have a totem near the fire.
Unlike other bosses, finding the Vegvisir is usually more of a challenge than finding the altar itself. The Vegvisir spawns in and around little stone Fuling structures, while the altar has five huge stone pillars emerging from the ground in the shape of a hand. It might take some time, but looking for the latter is sure to be more successful for you.
You won’t need to bring much for this fight, assuming you were well prepared for the last one. Switch out your frost resistance mead for fire resistance ones, craft Frostner and a Draugr Fang if you haven’t already, and bring your best munitions and food. Keep to cover, and you’ll cut through the boss with ease.
With the final boss defeated, you will have achieved a victory worthy of Valhalla. Sadly, your rewards will likely leave you wanting. The trophy and power are nice, if a bit useless at the moment, but the item drops are literally useless. For now, there is nothing you can do with them, save for stashing them in your house as weird little ornaments. Either way, with your quest completed, you are now free to do as you please. I’d recommend building yourself up more and doing some frontier exploration. There are some incomplete biomes that can be visited, with the developers confirming content for them in the future.
Though your fight has ended, it certainly won’t stay that way forever. When more is added to the game, I’ll be sure to update this Valheim progression guide to include all the necessary information on future biomes, bosses, and gear. Until next time!
Frequently Asked Questions
How Big Is The World In Valheim?
According to the Valheim map, which has a 10-kilometer radius within its flat circle, measures approximately 314 square kilometers. For comparison, that is a whopping 16 times bigger than that of The Elder Scrolls 5: Skyrim. To cover the entire map on foot you can expect it to take over four hours which allows for a large amount of gameplay.
However, although Valhein undoubtedly has a very large world to explore, it is worth noting that the map has vast areas of majoritively empty oceans as well as procedurally repeated biomes throughout. Don’t let that deter you from the game though, as there is still plenty to do within the world.
While making your way through the exceedingly large map, you’ll need to ensure you have the correct equipment to be able to harvest materials, craft weapons, make potions, cook food, and develop your skills.
Is Valheim 2 Player?
The good news is that you won’t have to venture through the wild and brutal Viking-inspired wastelands on your own in Valheim 2 since the game not only supports co-op with other players but actually encourages it considering how dangerous the raging seas and bloodthirsty monsters you encounter are.
In fact, while you can explore the beautifully harrowing world of Valheim with just one buddy, each server has a maximum capacity of 10 players allowing everyone to jump into the same game and slay monsters together alongside picking up all that precious loot.
While the online co-op works very well, unfortunately Valheim 2 does not support couch co-op through split-screen and since there have been no indications that Iron Gate Studios are going to introduce this any time soon, mods may be the best way to go if you and a friend want to play on the same screen.
What Happens When You Beat All Bosses In Valheim?
Valheim may have plenty for you to do when exploring and surviving its world, but there are also a few bosses (known as “The Forsaken”) for you to defeat.
Completionists among you will want to finish off the five bosses that Valheim has to offer, which are: Bonemass, The Elder, Eikthyr, Yagluth, and Moder. Summoning and defeating these is one thing, but what happens when you’ve finally beaten them all?
Well, until further updates come, not much. The best thing to do after you’ve beaten the bosses is simply continue playing as you had been, only now getting to use the powers you’ve got from defeating the Forsaken. These will be particularly exciting to try out against enemies!
On top of that, you can simply continue exploring the procedurally-generated worlds of Valheim, gathering essential resources, improving your bases, and upgrading their gear to the highest levels. Hopefully, a future update will add even more post-boss content!