
- Last Updated on
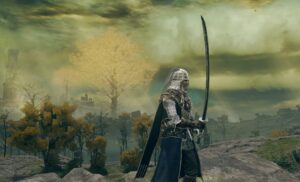
Quite like the Gourd Seeds, Prayer Bead necklaces are a set of key items that are critical to increasing your survivability. Unlike the Gourd Seeds, however, these necklaces are much more of a challenge to get, requiring you to search off the beaten path, and defeat minibosses that will give you a run for your money.
Once you have four Prayer Beads in hand, you can make a necklace at an Idol that increases your health and posture by 20%, making for an impressive 200% boost if you find them all.
They are worth the effort though. Sekiro is a notoriously difficult game, making the sub-title “Shadows Die Twice” quite the understatement. Unless you are a veteran of FromSoft games, you’ll probably want any advantage you can get in a game that doles out merciless punishment for minor mistakes. Prayer Beads offer one such advantage, if you have the wherewithal to bag all forty.
To make this task a little more manageable, I’ll be going over how you get every Prayer Bead in Sekiro, going through each section of the game in the order you encounter them. I’ll aim to be sparing with spoilers in this guide, though as a fair few are missable, some spoilers will be unavoidable. Without further ado, let’s explore all the prayer bead locations!
💥 Don't Miss These Latest Deals 💥

- 27 inch QHD (2560*1440) display with the DCI-P3 90% wide color gamut brings what you’re watching to life in over 16.7M colors

- Nvidia ampere streaming multiprocessors
- 2nd generation rt cores:
- 3rd generation tensor cores

- NVIDIA GeForce RTX 3070 Ti GPU
- 12th Gen Intel Core i7 14-Core CPU
- Next-Gen Vapor Chamber Cooling
Ashina Outskirts: Prayer Beads 1-5
Ashina Outskirts is home to five Prayer Beads, all of which are pretty hard to miss, as long as you’re doing the bare minimum in exploration. You can find a sixth here toward the end of the game, but I’ll get to that later.
General Naomori Kawarada: Bead 1
The General will be your first proper trial by combat, putting your understanding of the basic game mechanics to the test. He is a short distance from the Gate Path Idol, rewarding you with the first Prayer Bead, amongst other items, upon your victory.
Chained Ogre: Bead 2
The second Prayer Bead will prove a bit more of a challenge to acquire. You might have found Naomori a bit of a pushover, though don’t go into this fight with that in mind. The Chained Ogre is close to the Stairway Idol, which isn’t far from Naomori.
If you’re having an issue with this miniboss, and yes, he is indeed meant to be nothing special, there are a couple of tricks you can employ. First, if you have a Gachiin’s Sugar, you can use it to sneak behind him and pull off a backstab. Second, he is weak to fire, which will make him cower for a few seconds, plenty of time to deal some damage. Once killed, the second bead will be your reward.
Tenzen Yamauchi: Bead 3
The third in a chain of miniboss drops, this next Prayer Bead is also close to the Stairway Idol. After defeating the Chained Ogre, grapple through the hole in the wall and your next foe will be visible from there.
As with General Naomori, you can deliver a sneaky death blow to Tenzen, though it will be much easier to achieve once you clear the area of other enemies. After besting Tenzen, you will receive the next bead.
The attic of the Tengu’s temple: Bead 4
After defeating Gyoubu Oniwa, move in the direction you came from, toward a tall temple. There will be a set of stairs leading up to its entrance. Once inside, meet with the Tengu of Ashina, then grapple up through the damaged interior of the temple. Once in the attic, you can find the fourth bead in the treasure chest. With this, you can make your first necklace, granting you the first buff to your stats.
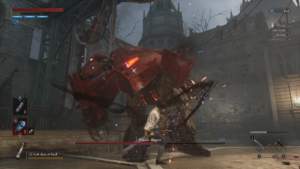
Blazing Bull: Bead 5

The fifth and last bead in Ashina Outskirts is dropped by the Blazing Bull, the miniboss blocking the way to Ashina Castle. He can be quite tricky, dealing an awful lot of damage and applying the burn ailment. The firecrackers Shinobi Prosthetic can stun him, allowing you a bit of respite from his unrelenting charges. Calming this beast will reward you with your next Prayer Bead.
Also Read: Undead Bone Shard Dark Souls 3 – How To Find Each Location
Ashina Castle: Prayer Beads 6-10
Another five Prayer Beads can be found in Ashina Castle, with an additional three at a later stage in the game. Most of them are easily found, though one in particular is especially well hidden, a big jump in difficulty to the preceding beads.
General Kuranosuke Matsumoto: Bead 6
The first Prayer Bead you’ll come across in Ashina Castle will be dropped by General Kuranosuke. He is found at the top of the stairs leading to the castle, accompanied by four riflemen. It’s best to deal with the riflemen first, then deal with the General. As with many of the other minibosses, you can deliver a stealth death blow to Kuranosuke to make things easier.
Upper Tower – Antechamber Idol, Hidden Wall: Bead 7

Climb up to Ashina Castle, then run across the main roof until you reach a window. Grapple through, then rest at the Idol. There are a bunch of Nightjar ninja on the way, though they’re easy to avoid. Once inside, clear the area of samurai until you reach the room with a hole in the ceiling.
Also Read: Sekiro Prosthetic Tools
On the wall where the two samurai were seated is a wall scroll, indicating a hidden wall. Hug it so it opens into the secret room, then claim your prize. This is the toughest bead to find in this area, so enjoy collecting the rest with ease.
Jinusuke Saze: Bead 8
Close to the top of Ashina Castle is another window, this time guarded by a Master Swordsman. He is necessary to defeat in order to progress, so killing him and receiving his Prayer Bead is unmissable. With it, you will be able to make your second Prayer Necklace.
Seven Ashina Spears, Shikibu Toshikatsu Yamauchi: Bead 9
The next two beads follow a different branching path, starting from the Ashina Reservoir Idol. Continue down the main path, clearing the area as you go. On the right, you will see a set of stairs leading to a temple. At the top stands Shikibu, holding your ninth Prayer Bead hostage.
Lone Shadow Longswordsman: Bead 10
Backtracking from Shikibu, go to the area with the tall grass and follow the wall around. Blocking your path through the waterway is the Swordsman. Killing him will reward you with a Prayer Bead. You can get the drop on him using a hole further up from the entrance, if he’s giving you trouble.
Hirata Estate, First Memory: Prayer Beads 11-13
The first memory holds three Sekiro Prayer Beads and requires a bell in order to enter it. You can acquire the bell from the old lady near the Gate Path Idol, then offer it to the Buddha statue at the Dilapidated Temple. Two are unmissable, one is hidden.
Shinobi Hunter: Bead 11

The Shinobi Hunter is located in the bamboo forest area, along with a couple of other bandits. Kill him for your Prayer Bead.
Juzou the Drunkard: Bead 12
Juzou is the second miniboss of the Estate, guarding the way into the Main Hall. He is also accompanied by a squad of bandits, which you should prioritize first. Kill the Drunkard for your bead.
Main Hall – Hidden Wall: Bead 13

Inside the Main Hall will be two patrolling bandits and an Idol. The bandits patrol a route close to the Idol, with one end being a hidden wall marked by a wall scroll. Hug that wall to open it, then pillage away.
Ashina Depths: Prayer Beads 14-21
Eight Prayer Beads can be found in the Ashina Depths, though three are unavailable until you beat certain bosses.
Snake Eyes Shirahagi: Bead 14
However you enter the Ashina Depths, you will need to face off against Shirahagi. The poison swamping the area can be a pain, though there are plenty of grappling points to use. You might find close quarters makes the fight easier, since she doesn’t rely on her rifle as much. Once defeated, you’ll collect your eleventh Prayer Bead.
Nearby the Ape’s Den: Bead 15
This bead is easy to miss, though not a slog to reach once you know it’s there. After defeating Shirahagi, walk through to the Ape Den but don’t drop down. There is a grapple point on the left, which will lead you to a tunnel with two overhangs. Pass through the first and turn left, then climb the wall jumps. Grapple up to the statue and there you have it.
Tokujiro the Glutton: Bead 16
Tokujiro is in the Misty Forest, creating a monkey army. Keep to the left side of the forest and follow it around, there will be grapple points and a wall to shimmy across. Once at his camp, kill him and claim his bead.
O’Rin of the Water: Bead 17

O’Rin is near the Water Mill Sculptor’s Idol, waiting with a Prayer Bead to ambush you. Either go through the dialogue or get the drop on her with a backstab, then kill her and take your well-earned bead.
Inside the water mill house: Bead 18
Passing by O’Rin, you will encounter the final house of Mibu Village, one with a load of enemies outside. On the right of the door, there is a hole you can crouch through. Once under, go to the left-most side of the house, then use the shinobi door to get inside. The Prayer Bead is on the shrine.
Mibu Village Lake: Bead 19
To get this bead, you’ll need to defeat the Corrupted Monk boss for the Mibu Breathing Technique, which allows you to dive underwater. You won’t have to wait long though, as this is the main boss of this area. Once you have it, dive to the bottom of the lake in Mibu Village for your Prayer Bead.
Headless Ape: Beads 20 & 21
Both beads require you to defeat the Guardian Ape boss, which is the main boss of the Sunken Valley area. Once you kill him, go back to the Poison Pool Idol, then hop down into the area that was guarded by Shirahagi. In there is the Headless Ape and his mate, their defeat rewarding you with two Prayer Beads.
Sunken Valley: Prayer Beads 22-25
Four beads are up for grabs in the Sunken Valley, all of which are fairly close to the start of the area. There are two from minibosses and 2 off the beaten path.
Near the Under-Shrine Valley Idol: Bead 22

Starting from this idol, turn back and run up the hill until a grapple point. Grapple across, then jump over to the climbing wall and climb up. At the top, there is another climbable wall with a ledge atop that. Shimmy across, then jump over to the snowy area. Your bead is in the snow in front of the large shrine.
Snake Eyes Shirafuji: Bead 23
Shirafuji is a miniboss on the main path to the Gun Fort. She is close to the Sunken Valley Idol, holding your Prayer Bead hostage on the main platform. Kill her to free it.
Long-Arm Centipede Giraffe: Bead 24

Another miniboss on the main path to the Gun Fort is the Giraffe. He is close to the Gun Fort Idol, inside a small room. He’s good practice for perfectly parrying barrages, if you can stomach his ghastly appearance up close. Once killed, the Prayer Bead will be yours.
Below the Gun Fort: Bead 25
After killing the Giraffe, look for the hole in the floorboards in the room. Follow the tunnel through until you reach the cave, then take the two right-hand grapple points. Up and to the right is another grapple point, then further forward is a final grapple point. You will end on a high-point, drop down into the lizards and little Giraffes for your bead.
Abandoned Dungeon: Bead 26
Next to the Abandoned Dungeon Entrance Idol is a merchant. For 1400 sen, you can buy a Prayer Bead from him.
Senpou Temple, Mt. Kongo: Prayer Beads 27-29
Senpou Temple is home to three Prayer Beads, two of which are rewards from minibosses, and one is hidden in a pond. The latter will require the Mibu Breathing Technique, though if you’ve followed this guide until this point, you’ll have that already.
Armored Warrior: Bead 27

Now for one of the toughest fights in Sekiro. Not because of the battle itself, but rather because of your opponent’s backstory. If you’re up for a real tearjerker, check out this video for a dive into the knight’s lore. Fighting him is mandatory, as he guards the bridge near the Shugendo Sculptor’s Idol which you need to cross to proceed. A Prayer Bead will be your reward for staining your hands.
Treasure Carp Pond: Bead 28
After the aforementioned bridge is a pond which you can dive into. In it are two Treasure Carps, with the bead nestled in the hand of a statue. To reach it, you’ll need to have the Mibu Breathing Technique.
Long-Arm Centipede Sen-Un: Bead 29
Starting from the Temple Grounds Idol, jump down and grapple across the Treasure Carp pond. Follow the grapple points until the roof of the larger, open-air temple. Run across the roof to the opposite end, then turn right and drop down onto a building. There is an opening in the roof that you can jump down and onto the rafters, above Sen-Un, your target. Kill him to claim the last Prayer Bead of Senpou Temple.
Ashina Castle, occupied by ninja: Prayer Beads 30-32
After you have acquired the key items requested by Kuro, upon your return to Ashina you will notice a few differences. In the new and improved Ashina Castle area, three new Prayer Beads are up for grabs, all of which are from miniboss fights.
Lone Shadow Vilehand: Bead 30
Your first opponent is the Vilehand, who has taken the place of Jinusuke Saze in the Ashina Dojo. Kill him for your first Prayer Bead of the area.
Chained Ogre: Bead 31
The Chained Ogre awaits your rematch at the bottom of Ashina Castle. Start at the Upper Tower – Antechamber Idol, then go to the main room that was patrolled by samurai and drop down. You can deliver a plunging deathblow to the Ogre as you drop down. Once you kill him, the next bead will be yours.
Lone Shadow Masanaga the Spear-Bearer: Bead 32
The last miniboss you must kill is Masanaga, an oddly-named ninja located at the Great Serpent Shrine. Wolves are hidden just outside the shrine, which you should deal with first for an easier fight. If you’re struggling with Masanaga, you can stealth around the back of the shrine and deliver a death blow. Once he’s killed, the last bead of the ninja-infested area will be yours.
Hirata Estate, second memory: Prayer Beads 33-34
The two Sekiro Prayer Beads in the second memory are only available if you’re pursuing a certain ending, namely the Purification one. Click here for a concise set of steps to follow in order to achieve the ending. Once you have completed the prerequisite steps and have acquired the second bell, offer it at the Buddha statue in the Dilapidated Temple to continue.
Lone Shadow Masanaga the Spear-Bearer: Bead 33
You will start just outside the area you found the Owl in during the first memory. In his place, Masanaga, still bearing a particularly unusual spear, will be waiting. You can’t sneak by, so I’d suggest you charge him and keep in close combat. If you give him breathing room, he will likely whistle for three supporting wolves. The thirty-third bead will be your reward.
Juzou the Drunkard round two: Bead 34
Juzou is awaiting his rematch in front of the main hall, where he was in the first memory. Clear the area of enemies before you begin to simplify the fight. Your victory will net you the final Prayer Bead of Hirata Estate.
Fountainhead Palace: Prayer Beads 35-37

Now for the last leg of your Prayer Bead collecting quest. The flooded palace holds three beads, two of which are from minibosses, with the third hidden away.
Sakura Bull of the Palace: Bead 35
If you found the Burning Bull a nightmare, then I wish you luck on his spiritual successor. Start from the Flower Viewing Stage Idol, turn left and move behind the courtyard full of Mist Nobles. With the courtyard wall on your left, follow it down until the Sakura Bull shows itself. You have much more wiggle room and an escape this time, so the fight shouldn’t be as difficult as the Burning Bull, though he still isn’t easy. Put the beast to rest for your Prayer Bead.
Okami Leader Shizu: Bead 36

Continue to the main part of the palace, then make your way over to the Great Sakura Tree overlooking the lake. There is an Idol and a grapple point onto the tree. At the end of the branch is Shizu, holding your thirty-sixth Prayer Bead. Kill her to retrieve it.
At the bottom of the lake: Bead 37
The final bead in Fountainhead Palace rests at the bottom of the Great Carp’s lake. With Shizu dead, you now have free access to the lake without fear of being zapped. There is a skeletal Carp at the bottom of the lake flanked by two Headless. The Prayer Bead is in a treasure chest next to it. You can dash to the chest and retrieve it without fighting the Headless.
Ashina Castle aflame: Prayer Beads 38-39
The penultimate area. As you return from the Divine Realm, you will find Ashina has changed once again, the Castle area offering up a further two Prayer Beads for your collection, both of which dropped by minibosses.
Ujinari Mizou: Bead 38
Mizou is the third and final Ashina Elite you must face. He is found in the dojo beneath Isshin’s room, which can be entered from two ways. The first is the main entrance, which can be accessed by starting at the Ashina Dojo Idol, walking down the stairs to where the two samurai were once standing, then slashing the panels. Go forward and right for the secret entrance. Alternatively, you can start at Isshin’s room and walk down the stairs to sneak up on Mizou. Kill him and obtain your bead.
Seven Ashina Spears, Shume Masaji Oniwa: Bead 39
The second Prayer Bead of the area is held by Masaji, an elite spearman close to the Ashina Reservoir Idol. He is accompanied by a General miniboss, though he doesn’t have miniboss stats. You can use a Gachiin’s Sugar to sneak up on them, either delivering a death blow to the spearman, or puppeteering the swordsman. With Masaji dead, the penultimate Prayer Bead is yours.
Ashina Outskirts aflame – Prayer Bead 40
Now for the final Prayer Bead. To access Ashina Outskirts, you will need to use a kite that is tied to a roof. Starting from the Ashina Gate Idol, turn right and grapple onto the roof. From there, you should be able to see the kite a little to your left, on a distant rooftop. Make your way over and grapple onto it. Race across the bridge and over to where you fought Tenzen many beads ago. Your final bead is held by Shigekichi of the Red Guard. Kill him, and your quest for forty Prayer Beads will be complete.
There you have it, all forty Sekiro Prayer Beads and all ten necklaces. Thankfully, they carry over into future playthroughs, so you won’t have to undertake the arduous bead saga again, though each Prayer Bead location will have a good item take its place. If you’re still looking for those elusive Gourd Seeds, check out our guide on how to find them.
Frequently Asked Questions
Does Sekiro Tell You Where To Go?
Sekiro is by no means an open-world game, but neither does it hold your hand and guide you from place to place. The intentional omission of a clear chronological path through the game affords the player certain freedoms that make the narrative feel a bit more fluid and more of an adventure.
It’s this navigational ambiguity that permits multiple different endings, one of the most beloved elements of Sekiro: Shadows Die Twice, but there are certain forgiving indicators that let you know you’re on the right path.
For instance, if you’re finding new enemies, it’s a good sign that you’re headed in something close to the right direction. Besides, as the game is relatively localized, you can find your way pretty easily just by following your feet and using common sense.
That’s not to say that you won’t get lost… a lot, but, you will find your way eventually — We promise!
Is Sekiro A Samurai Or Ninja?
The eponymous Sekiro, also referred to as Wolf or Ookami throughout Shadows Die Twice, is a Shinobi, which is a word derived from the Japanese “shinobu” meaning “to conceal oneself” — A dead giveaway!
Have you guessed it yet? Yep, that’s right; our dear protagonist, slayer of demons and men, is actually a ninja, but you’re correct to wonder, as there are certain aspects of this character that do seem to blur the lines between the ninjas and samurai of Japanese history.
For instance, Sekiro’s sword has a curved blade, making it a samurai sword — Traditionally, ninjas used straight-blade swords, as they didn’t have the resources in their poverty-stricken rural homes to forge anything as fancy as the samurai’s signature weapon.
Wolf also refuses to wear a lick of black, but get this… Generally speaking, ninjas didn’t wear black, as they would stick out like a sore thumb during the daytime. A ninja would actually wear something more akin to Sekiro’s rags, albeit with less armor beneath.
What Time Period Is Sekiro Set In?
While the exact setting of Sekiro is fictional, the game is intended to take place sometime during the tail-end of the tumultuous Sengoku period, which lasted from 1467-1615.
Also known as the ‘Warring States period’, the period saw the collapse of the Ashikaga Shogunate system, and the grab for power from the various samurai warlords fought four, resulting in near-constant civil war for control.
This helps frame the beginning of the game much better, as the bloody and brutal battle of the opening cutscene acts as just a taste of the kinds of conflicts that had been taking place across Japan in the years prior (although albeit perhaps not looking nearly as impressive or well-choreographed as it did here!).
While reforms were slowly made across the latter half of the period, the threat of civil war didn’t fade until the Tokugawa shogunate was established in 1603, and finally seized widespread control in 1615.