Search
Close this search box.

How To Enter The Lost River In Subnautica

Subnautica Lost River

Subnautica has a bounty of beautiful biomes, each clearly distinct from the last, and with its own secrets to explore. The Lost River is no different, being a treasure trove of resources, interesting sights, and secrets regarding the end of Subnautica’s storyline. If you want to uncover the secrets held in the depths of Planet 4546B, and get your hands on a wealth of critical resources, you’ll need to pay the Lost River a visit.

💥 Don't Miss These Latest Deals 💥

KOORUI 27 Inch QHD Gaming Monitor
Save Up To 20%
KOORUI 27 Inch QHD Gaming Monitor
  • 27 inch QHD (2560*1440) display with the DCI-P3 90% wide color gamut brings what you’re watching to life in over 16.7M colors
ASUS TUF Gaming NVIDIA GeForce RTX 3070 Ti OC Edition Graphics Card
Highly Rated
ASUS TUF Gaming NVIDIA GeForce RTX 3070 Ti OC Edition Graphics Card
  • Nvidia ampere streaming multiprocessors
  • 2nd generation rt cores:
  • 3rd generation tensor cores
Razer Blade 15 Gaming Laptop: NVIDIA GeForce RTX 3070
Save 20%
Razer Blade 15 Gaming Laptop: NVIDIA GeForce RTX 3070
  • NVIDIA GeForce RTX 3070 Ti GPU
  • 12th Gen Intel Core i7 14-Core CPU
  • Next-Gen Vapor Chamber Cooling

Gearing up for an expedition to the Lost River

Subnautica Lost River Preparation

First things first, you’ll need to prepare before venturing out in search of the Lost River. It’ll be a dangerous journey, one that’ll take you far from home. It can easily spell the end for the unprepared and under-equipped diver.

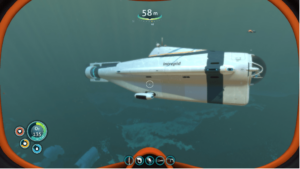
Your first priority is transport. The Lost River is deep, dangerous, and lacking in oxygen. You need a portable oxygen source, plus protection from what you’ll find within. To that end, a Seamoth with a Depth Module MK3 is a good idea; the vast majority of the Lost River is deeper than 500m, so a MK2 module won’t cut it. This will let you use any entrance to the Lost River with ease, but is best relegated to a scout role.

For a proper expedition into the Lost River, you should be using a well-upgraded Cyclops, ideally with at least a Sonar Upgrade and a Depth Module MK1, plus a docked Prawn Suit with a drill arm. This will act as your mobile base during your expedition, allowing you to efficiently explore and exploit the Lost River, along with what lies further below.

Next up, you’ll need supplies and personal equipment. Food is necessary; I’d suggest putting a grow bed in your Cyclops and growing some Marblemelons. This will keep you fed and watered, but bringing some fish and bottled water is fine too. Having a Reinforced Dive Suit will help you, as will a Stasis Rifle and a Repair Tool. For added caution, bringing a few spare Batteries and Power Cells is also good. Admittedly, this is quite a bit of preparation, but being ready for anything never hurt anybody. Encountering a Leviathan unarmed sure did, though.

Searching for an entrance to the Lost River

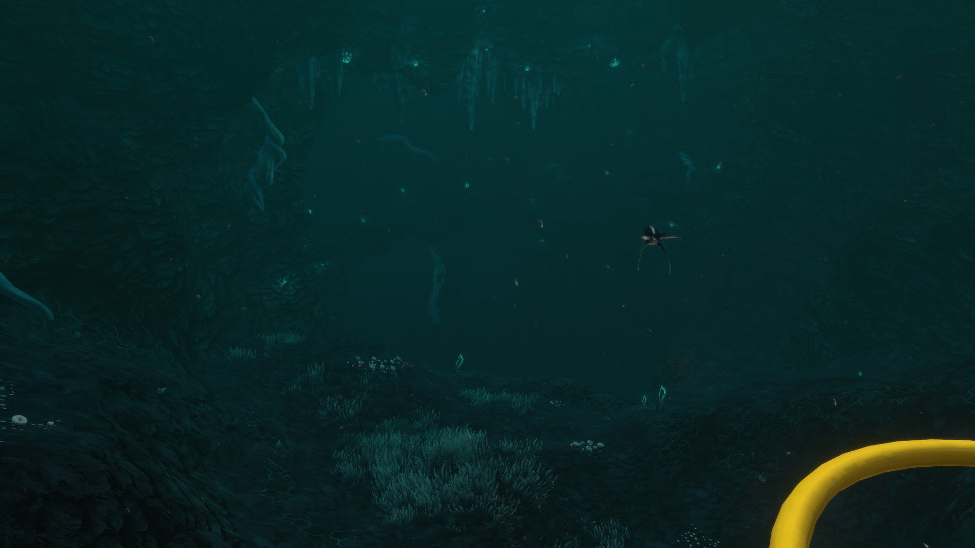
Once you’ve prepared to your satisfaction, you can head out in search of an entrance to the Lost River. There are four in total, with some being a better call than others. I’ll start with the one that I think is best, but you can use whichever entrance you prefer.

Also Read: Where To Find Cuddlefish
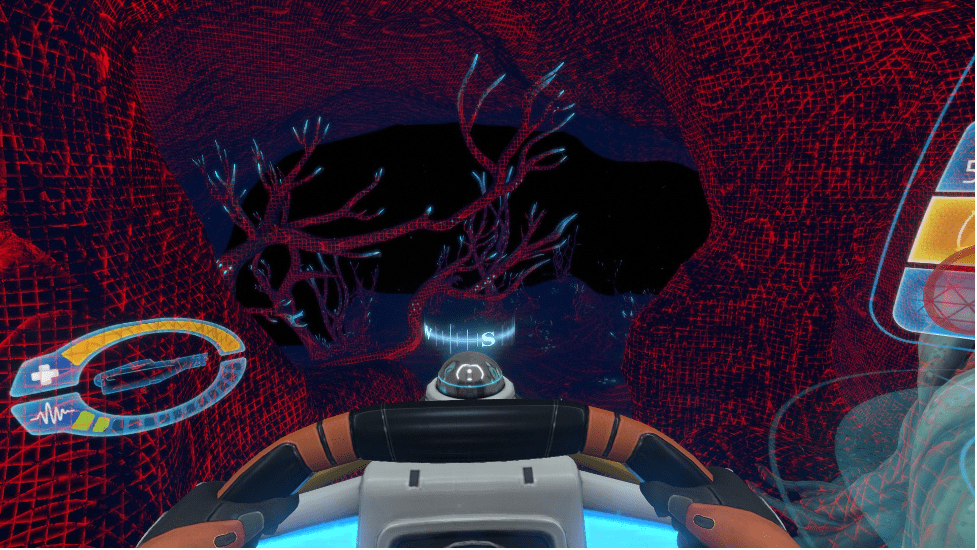
Blood Kelp Zone

Lost River Blood Kelp Zone

The first entrance to the Lost River, and my personal favorite, is found in the northern Blood Kelp Zone. This entrance is both easy and safe to reach, with neither small predators nor Leviathans to worry about. To reach it, you should head to the beacon for Lifepod 13, which you should have at this point if you aim to venture into the Lost River. This will take you to the Mushroom Forest biome, near the big tree.

From the Lifepod, you should follow a slight northeast bearing. You should end up at the edge where the Mushroom Forest and Blood Kelp Zone meet, marked by a narrow trench that gets progressively deeper. Follow that trench down as deep as it goes and look around; you should hear a pretty distinct sound and see a cave entrance with a bunch of green brine on its bed. This is the first entrance to the Lost River, and the easiest one for your Cyclops to navigate.

While it’s safe to get to this entrance, getting deeper isn’t quite so. Not far from the entrance is a somewhat open cavern with a brine waterfall at the back, which you’ll need to follow to go deeper. Problem is, there’s also a Ghost Leviathan Juvenile in here too. This guy isn’t that difficult to avoid, and probably won’t be much of an issue for your Cyclops, especially with silent running. Keep an eye on him and stick close to the floor; he goes to the cave’s ceiling a lot, so you can use that as an opportunity to run for the waterfall. He won’t follow you down there.

Blood Kelp Zone Trench/Dunes

Subnautica Lost River Cove Tree

The second entrance to the Lost River is also in the Blood Kelp Zone, though this time, it’s the southern one. It’s a bit more dangerous than the northern entrance, though; this one is close to the Dunes, which has a fair few Reaper Leviathans lurking about. If you’re unlucky, one will be lured close enough to the entrance area to give you trouble.

You’ve got two options to reach this entrance. You could either head to Lifepod 17 in the western Grassy Plateaus, then head ever so slightly southeast from there. You’ll end up near a large trench leading to the entrance. This is the more dangerous option of the two, as it will bring you to the Dunes and likely put you in the path of at least one Reaper. Instead, I’d suggest going southwest-west from your Lifepod, sticking to the Grassy Plateaus until you reach the Blood Kelp Trench. You should follow the Blood Kelp Trench right the way around until it ends at the Dunes. From there, head straight down.

You’ll drop directly onto a small plateau with a bit of wreckage on it, right in front of the entrance. You won’t be met immediately with a Ghost Leviathan, but it won’t be easy to fit a Cyclops in through here. It’s a good entrance for the Seamoth, bringing you straight into the belly of the Lost River and giving you a good area to explore. There is a Ghost Reaper a little ways inside though, so keep a lookout for him.

Sparse Reef/Deep Grand Reef

Lost River Deep Grand Reef

The third entrance is found in the Sparse Reef, close to the Grand Reef. This entrance isn’t ideal, as you’re almost certainly not going to get your Cyclops up to it, let alone through it. Even if you somehow squeeze it into the first gap, you’ll have to run a gauntlet of Crabsquids on the approach to the entrance. It’s a whole lot of work when there are two other entrances that are way easier. If you still want to use this entrance, here’s how.

Despite the difficulty of getting in, it’s an easy entrance to find. If you’ve got the Degasi Base in the Grand Reef unlocked, and you almost certainly do at this point, simply head there. If you haven’t, the route to this entrance will take you right past it, so you might as well give it a look. You can get a few scans, some important items, and some lore-related PDAs, which is worth stopping by.

To reach this base, head in the direction of Lifepod 19, roughly southwest of your Lifepod. Following this bearing, you’ll encounter a rocky outcrop where the Sparse Reef and Grassy Plateaus meet. Follow this outcrop as it goes deeper, then follow the cliff as it drops into the depths. Before long, you’ll end up at a crevice that peeks into the Deep Grand Reef. You’ll know it when you see it; there’s a bunch of blue orbs that you can’t miss. You’ll also see why bringing the Cyclops isn’t really an option.

Once in the Deep Grand Reef, head due north. You’ll encounter the Degasi base pretty quickly. Beware of the Crabsquids in the area, though. There are quite a few, and they don’t like electronics. Your Seamoth’s lights will attract them, and if they get close, they’ll EMP you and completely drain your Power Cells for a while. Avoid them and head northwest once you reach the Degasi base. You’ll easily spot little pools of green brine acting like a breadcrumb trail. Follow it to reach this entrance to the Lost River.

Mountains/Bulb Zone

Lost River Reaper

The last entrance also isn’t great, especially not if this is your first expedition. It’s really easy to fit your Cyclops through, being quite similar to the entrance in the northern Blood Kelp Zone, but this place is Reaper central. It’s easy to bump into one on your way here, and it’s easier to bump into a few trying to get inside the Lost River. If you’re up for the challenge, here’s how you get to it.

Starting from your Lifepod, I suggest you take a fairly indirect approach to Lifepod 12. You don’t want to pass too close to the bow of the Aurora, but you also don’t want to pass too close to the Mountains, either. Both will probably result in attracting at least one Reaper. Instead, you should follow a kind of northeasterly arc, passing through the Grassy Plateau, the eastern Mushroom Forest, and ending somewhere in the middle of the Bulb Zone. Once you see the glowing blue orbs, you’re in the right place.

Once you’re at Lifepod 12, head due north from it. You’ll end up at a precipice, overlooking a very sharp drop into the abyss. The entrance is directly below this precipice, and if you haven’t encountered a Reaper so far, you should get inside quickly before you do.

Facebook
Twitter
Reddit
Pinterest

You May Also Like

Leave a Comment

Articles You Might Like

Share This Article